Get Started
This guide will instruct you through setting up and deploying your first GTM Tagging Server. It also shows how you can start with server-side tagging.
Prerequisites
- GTM account with a web container
- GTM user with administrator role
- GA4 account with a web data stream
- Sooro account
Step 1: Create a Server Container
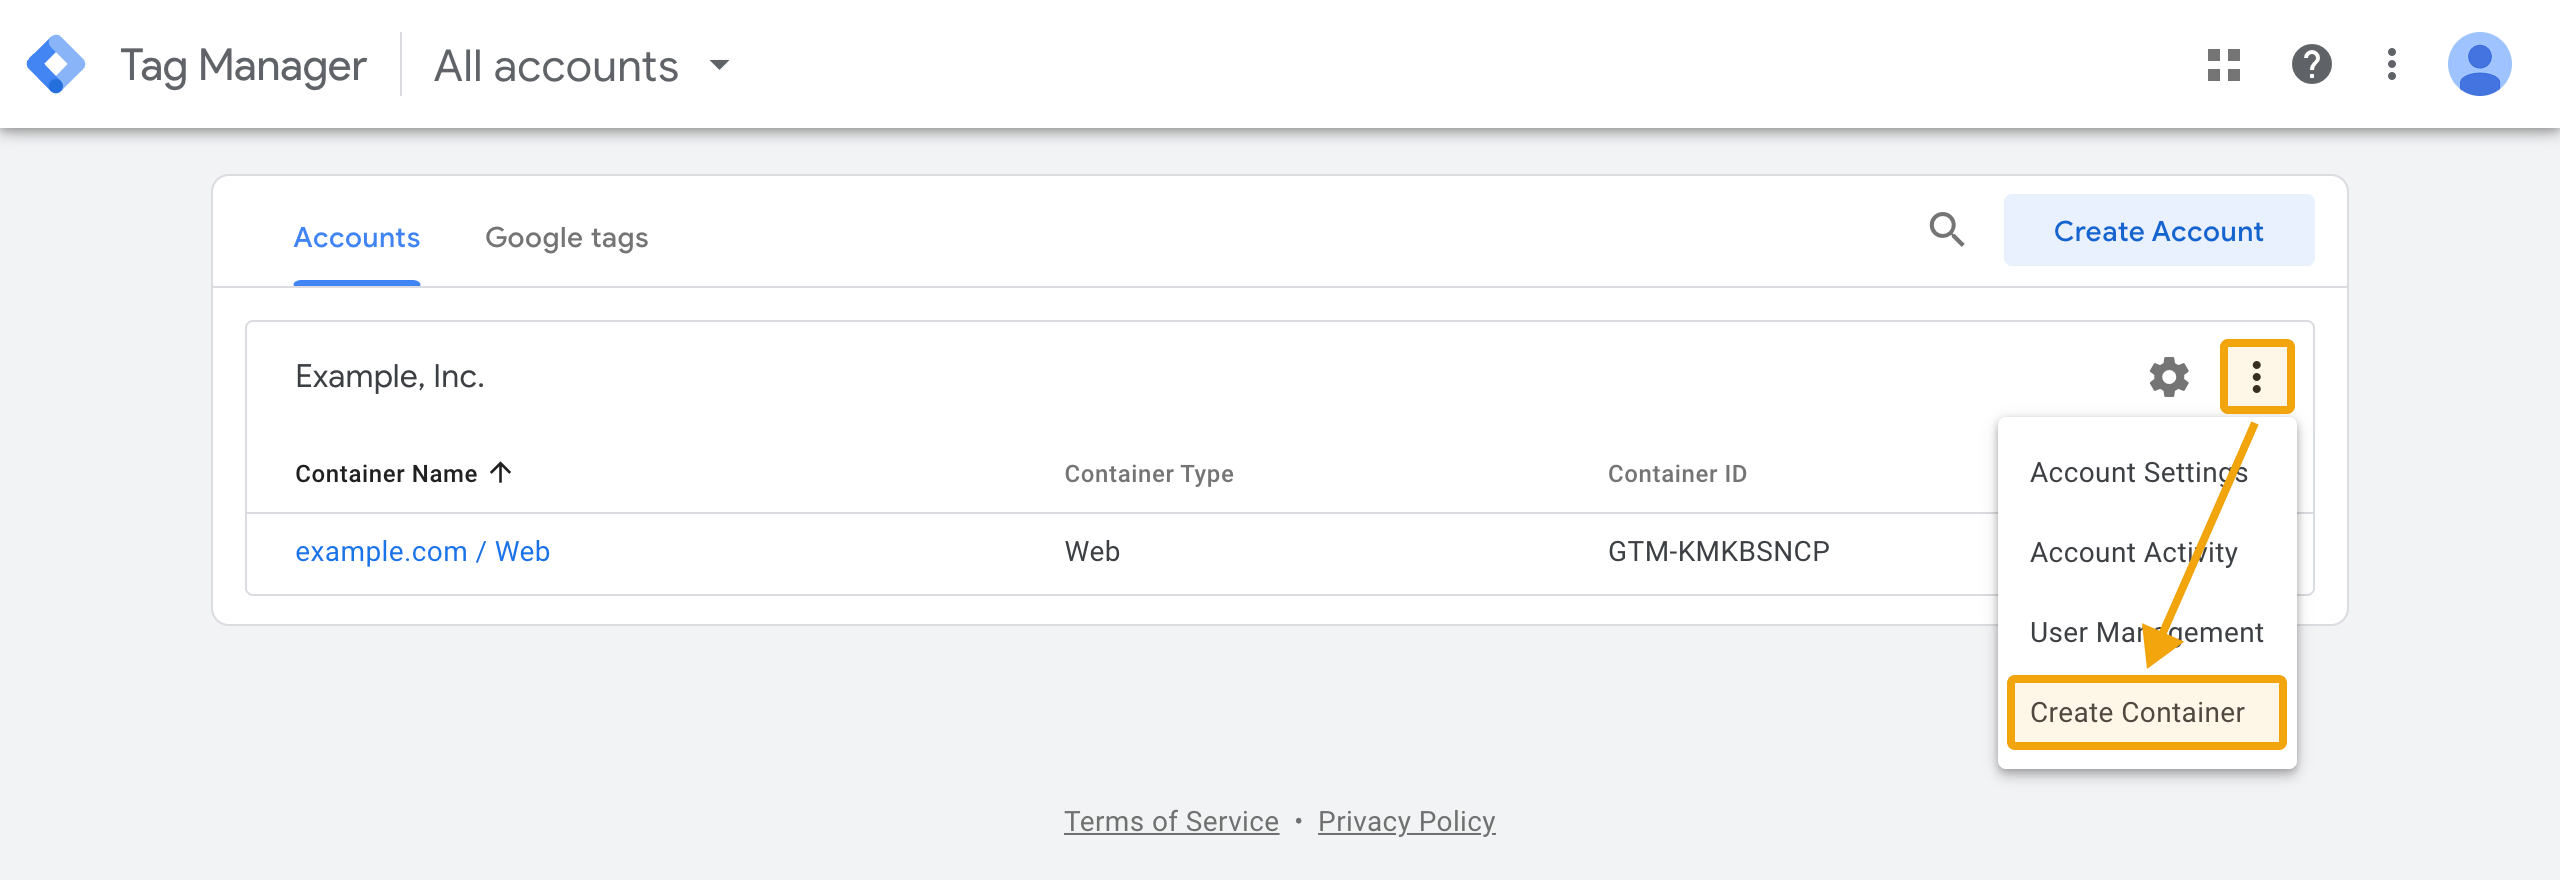
Let us start with the creation of the Google Tag Manager Server Container. Open https://tagmanager.google.com and start the creation process by using the three dots at the top right of the desired account. In the context menu choose the action Create Container.
In the window that opens (slide-over), you must specify the name and type of container. Basically you can give it any name you want. However, we recommend that you also specify the type of container in the name. This will make it easier to differentiate later when you are in a container.
As target platform choose Server. Afterwards you are ready to create the container by clicking on Create in the top right corner.

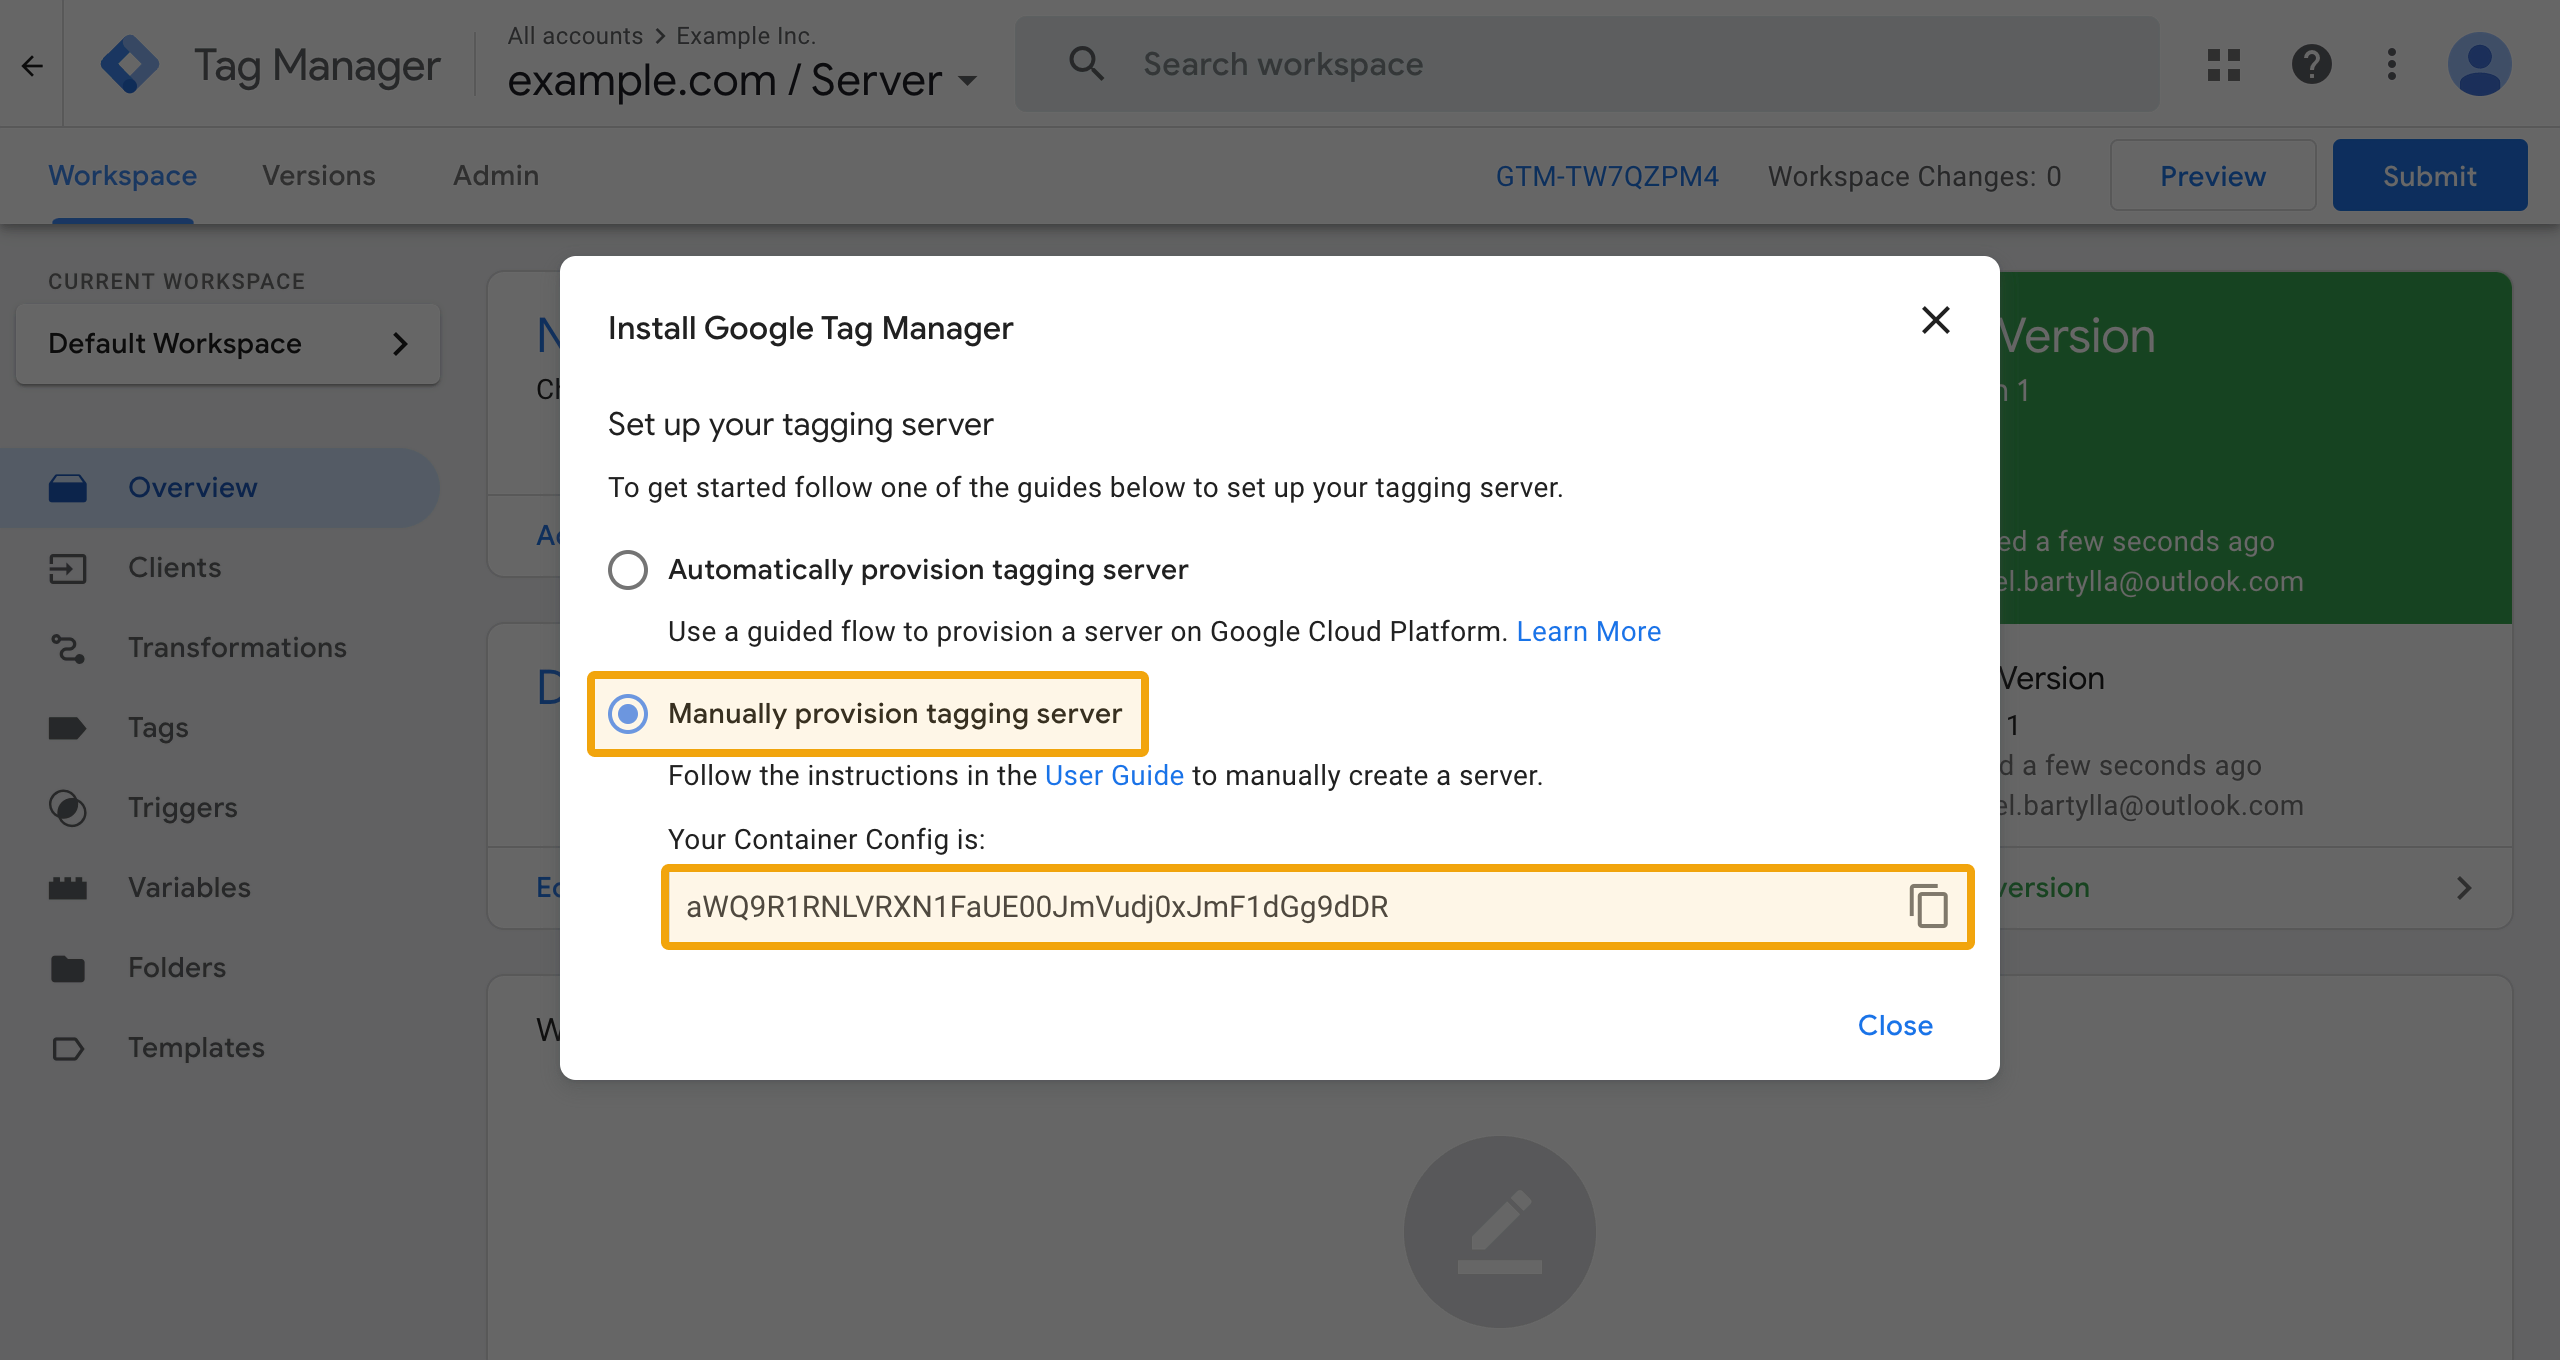
You will automatically be redirected to the newly created Server Container. You now need to decide how you will deploy your tagging servers. Here select Manually provision tagging server and copy the so-called Container Config(uration).
The container config is information encoded in base64, which, in addition to the container ID, also contains an authorization key. Your tagging servers need this information so that they can retrieve the configuration from the server container.
Step 2: Create your Tagging Server
Open https://www.sooro.io/app/organizations and select the organization for which you want to create the Tagging Server. On the following page you can start creating using the button Set up your first GTM Tagging Server in the middle of the screen or the New GTM Tagging Server at the top right corner.
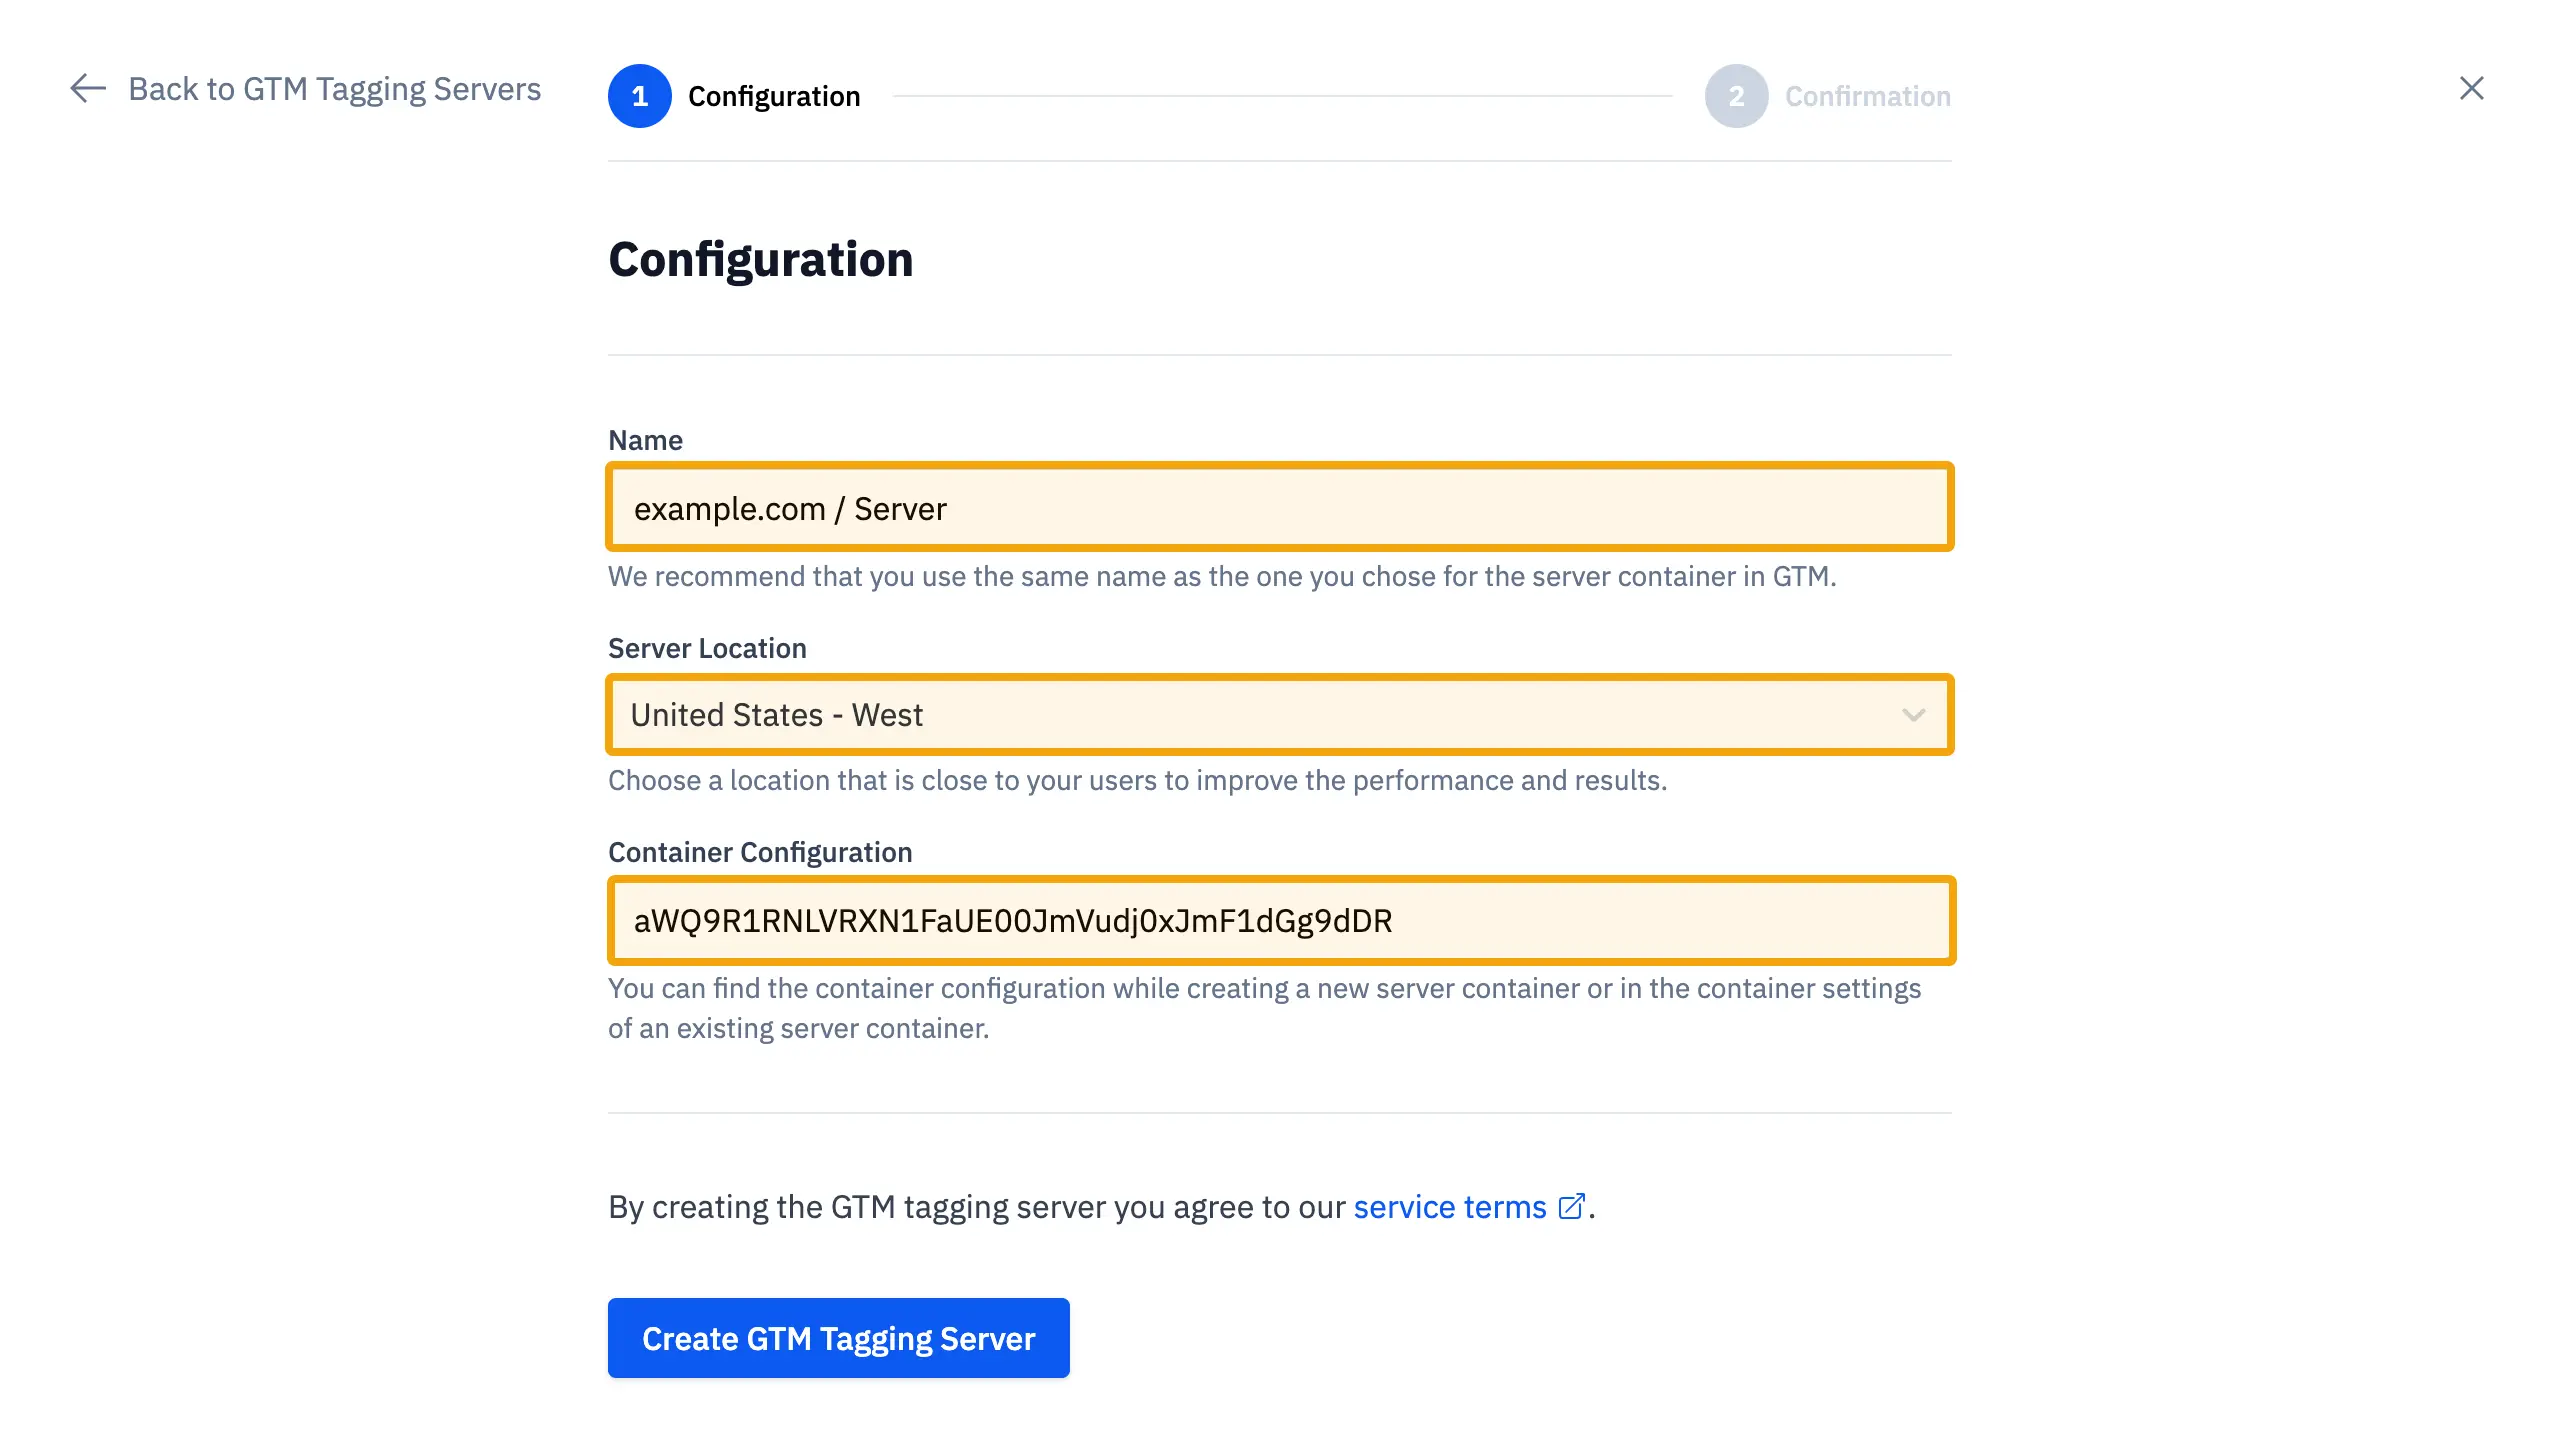
First, enter the Name of the GTM Tagging Server here. We recommend that you use the same one that you used in GTM to make the assignment easier. The Server Location you choose should be close to your customers so that requests are processed faster.
Under Container Configuration paste the value you copied at the end of the first step. If you no longer have the value: You can always find the container configuration in your GTM Server Container. Go to Admin > Container Settings > Set Up Tagging Server > Deploy Tagging Server Manually.
Once you have created the server, you will be redirected to the confirmation page. The URL shown here represents the Server Container URL, which must be stored in the GTM Server Container. This is necessary to activate the preview functionalities of the Server Container. To do this, go to your GTM Server Container and open the settings via Admin > Container Settings. Click Add URL and paste the Server Container URL. Save the changes to complete the step.

In the meantime your Tagging Server should be deployed and ready to use. When you click on Go to GTM Tagging Server at the creation confirmation page you will be redirect to the overview page of the specific server configuration. Please check there the status of you server. In case you see an error, please check again the value of the Container Configuration in the Settings tab. If you are unable to solve the error please get in contact with us.
Step 3: Configure your GTM Web and Server Container
It's time to implement server-side tracking. In the following we will first go through the changes to the web container before switching to the server container.
Go again to https://tagmanager.google.com, select your Web Container and create a new Workspace. Click on Tags > New to start creating a Google Tag.
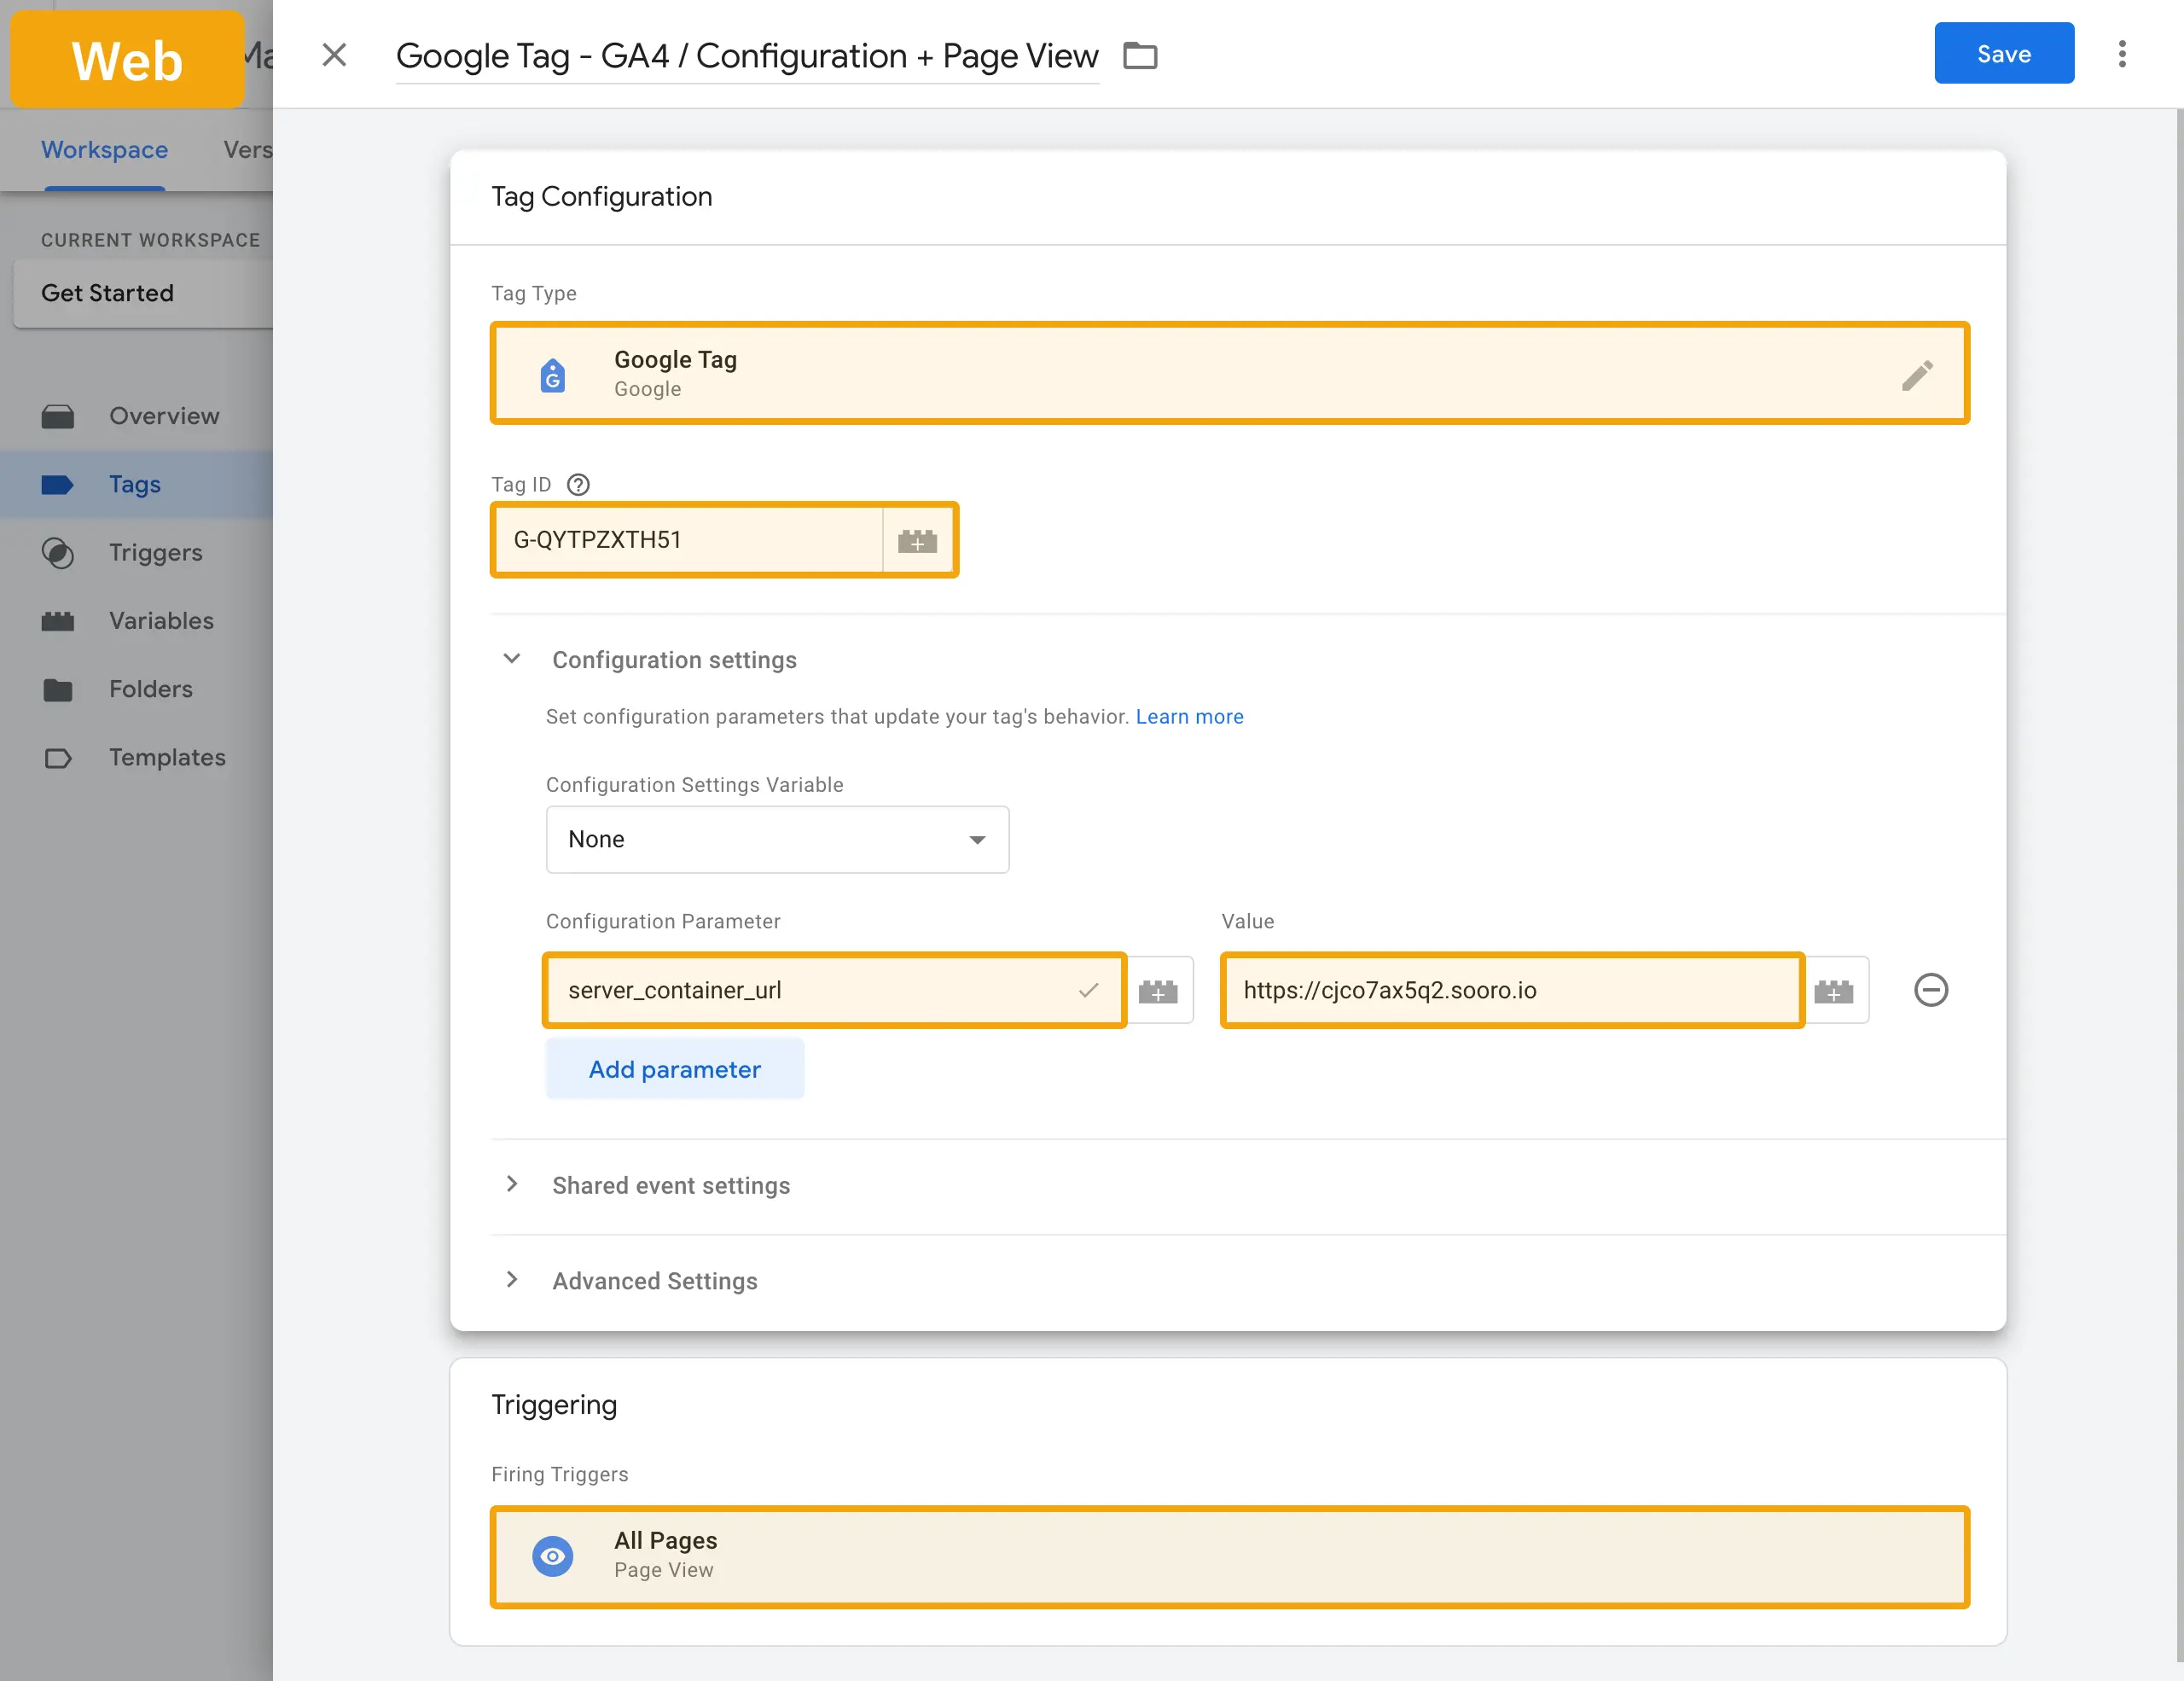
Enter your Google Analytics Measurement ID as Tag ID. Under Configurarion Settings > Configuration Parameters add an entry for server_container_url. As a value you use the URL under which your tagging server can be reached. This is the same URL that you had to enter in the Container Settings at the end of the previous step.
Add the All Pages trigger and then save the tag.
It's best to open a new tab in your browser and open your Server Container here. Create a new Workspace here too.
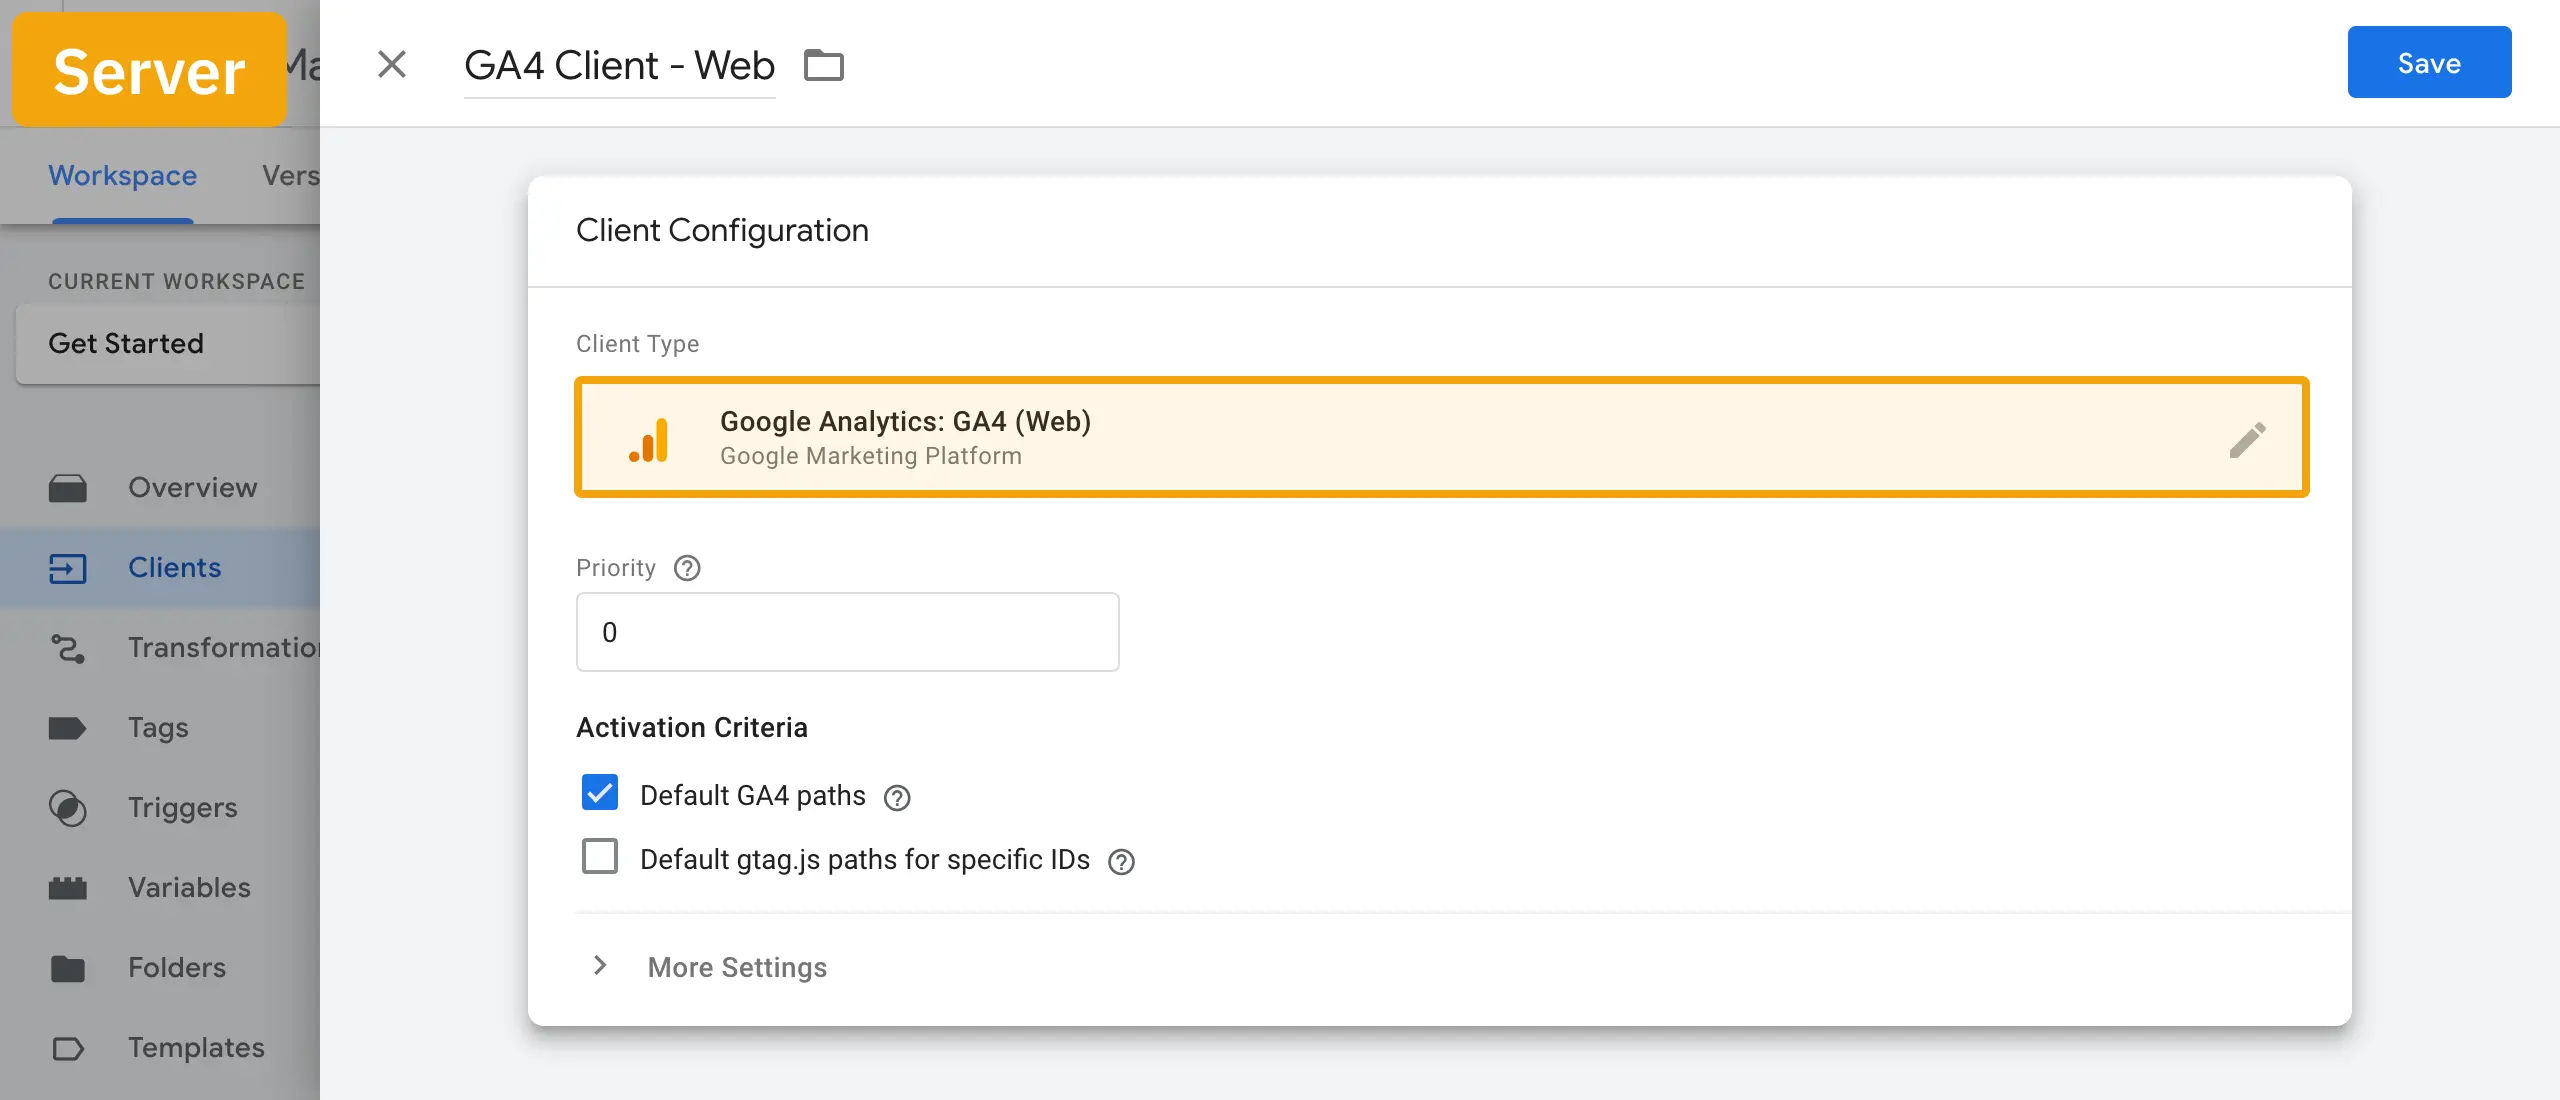
In order for your tagging server to process the incoming events, you need to create a so-called client. To do this, go to Clients > New to create a Google Analytics: GA4 (Web) client. After selecting the client type, nothing needs to be changed except the name, so you can Save straight away.
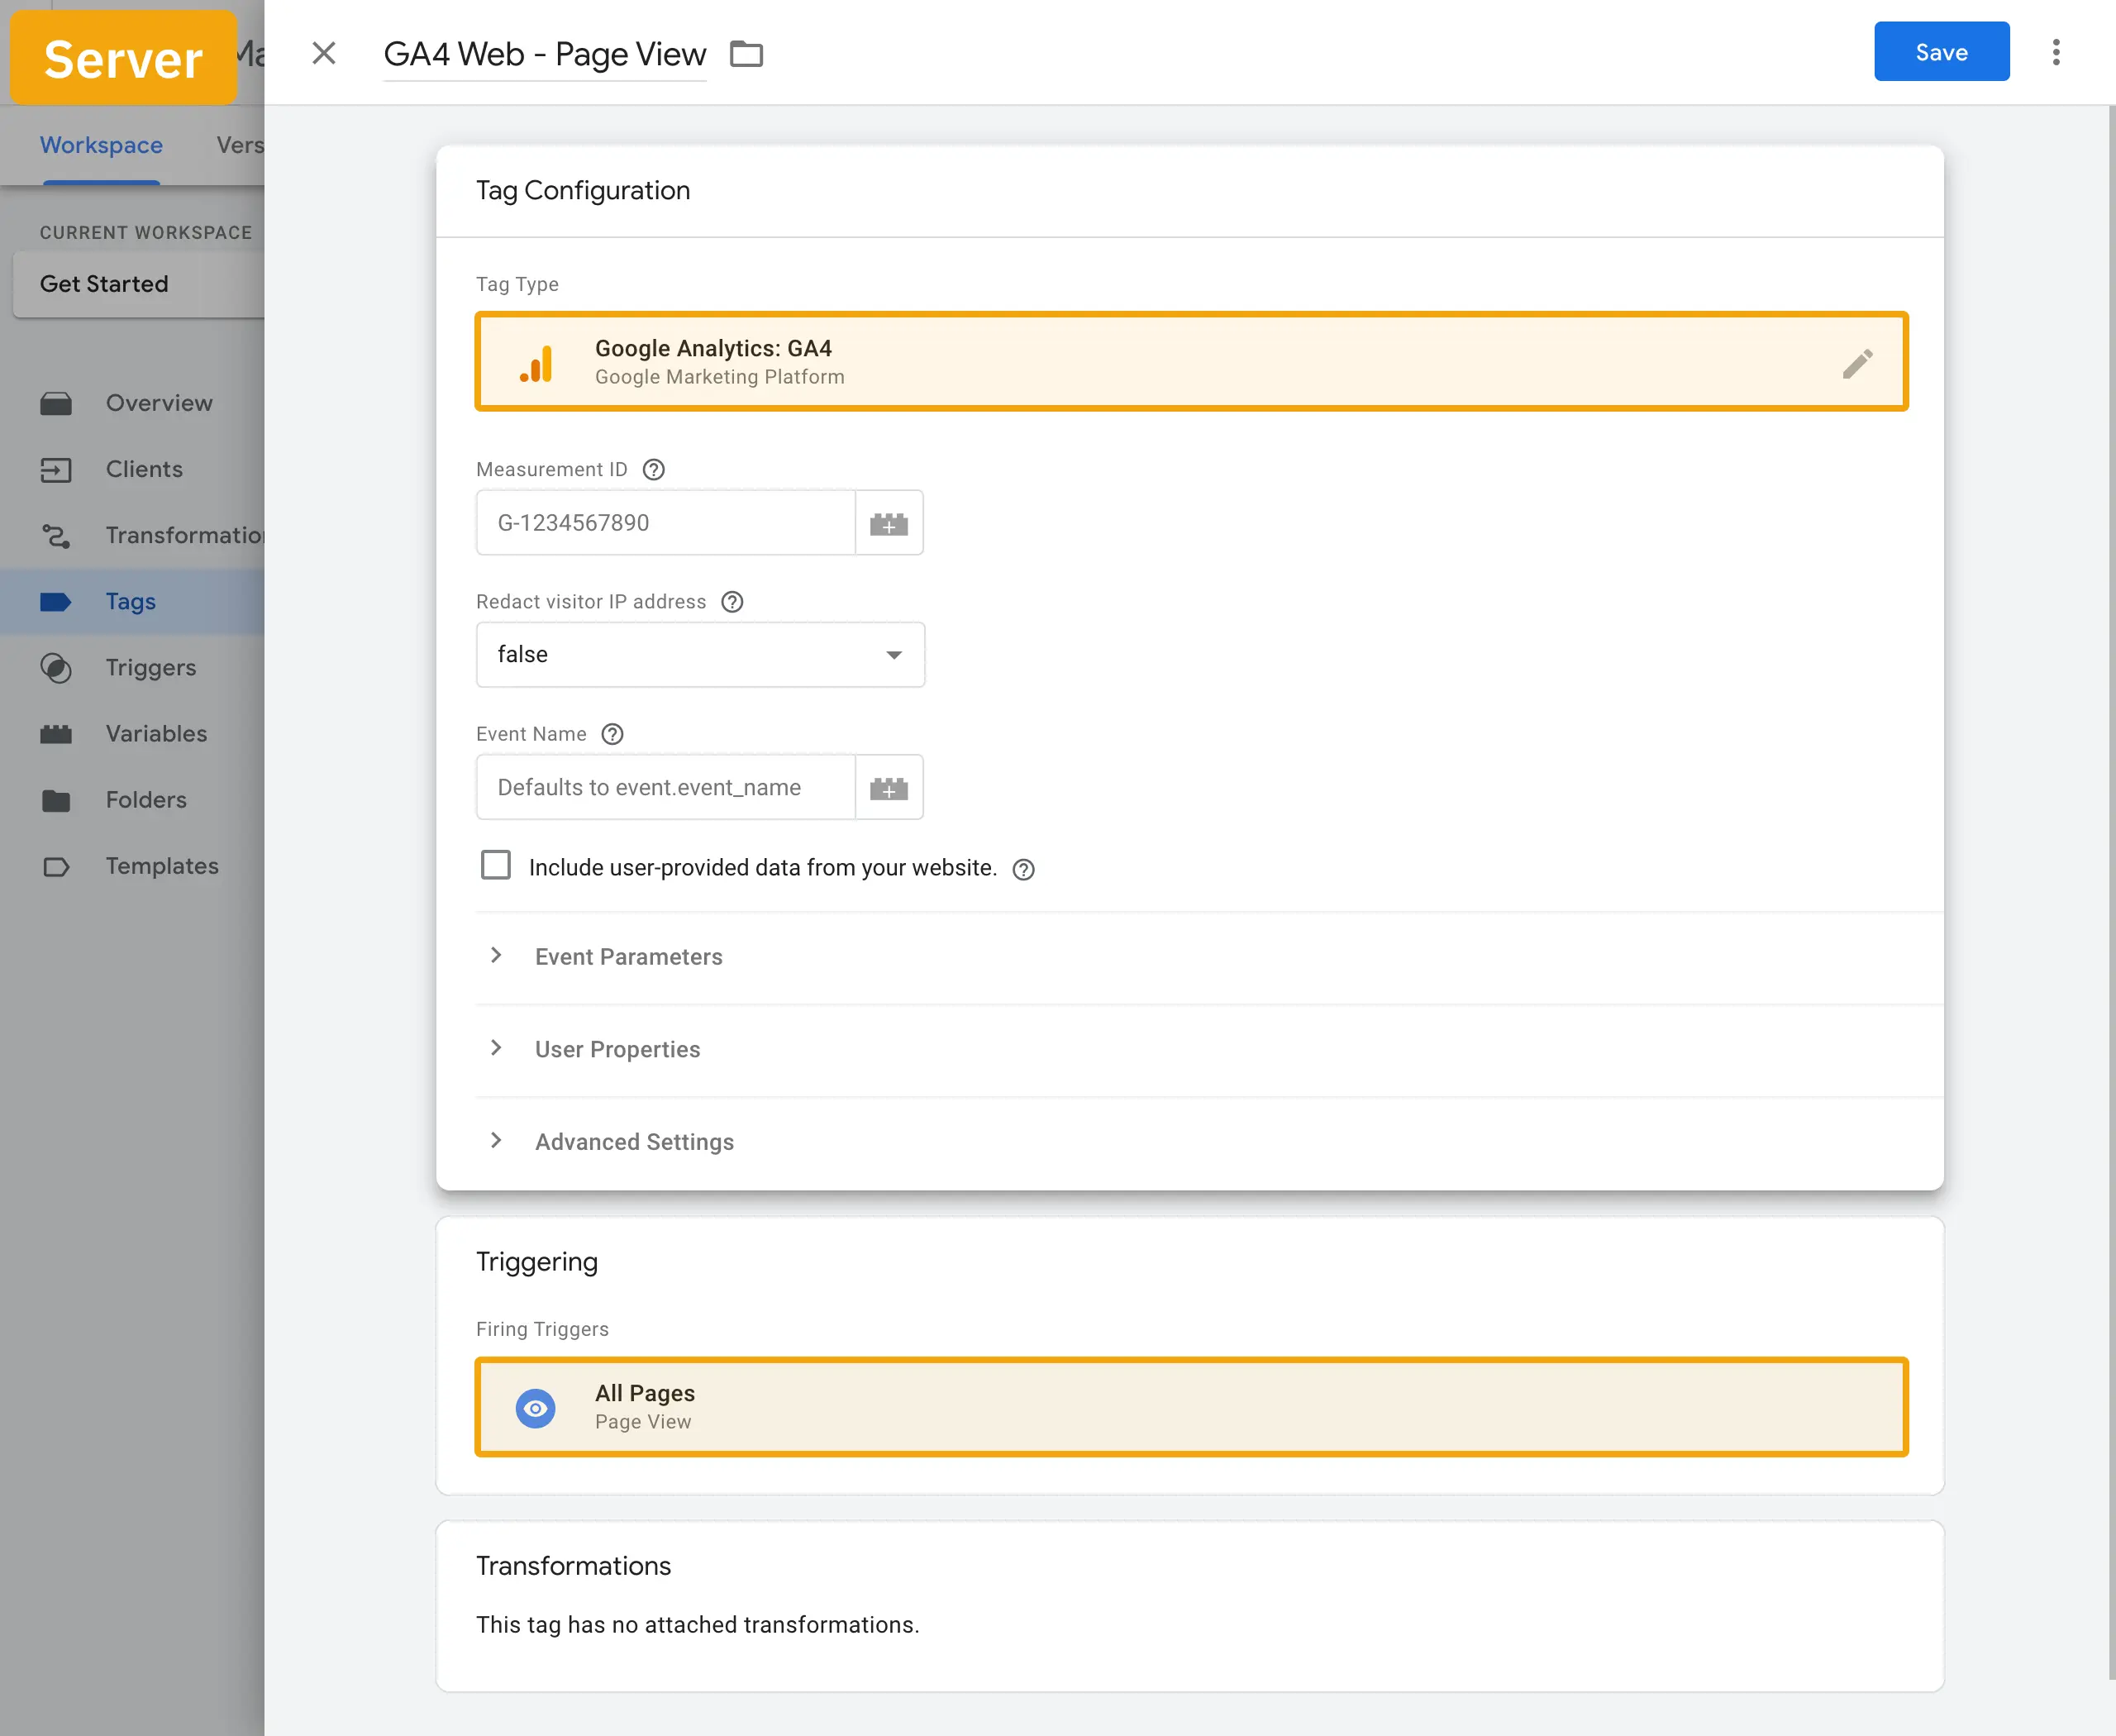
We still need one last element: a tag. As usual, you can start creating one by clicking on Tags > New. Select Google Analytics: GA4 as Tag Type. All you need to do is give the day a name and set a trigger. The tag template automatically extracts all relevant data from the events and determines the values for fields, properties and parameters. The prerequisite for this is that the event comes from a GA4 tag or Google tag with GA4 configuration from the web container.
Add the All Pages trigger and click on Save to continue.
Step 4: Start a Preview Session
All elements are now in place so you can see your server-side tagging in action. Start preview mode on both the server and the web container.
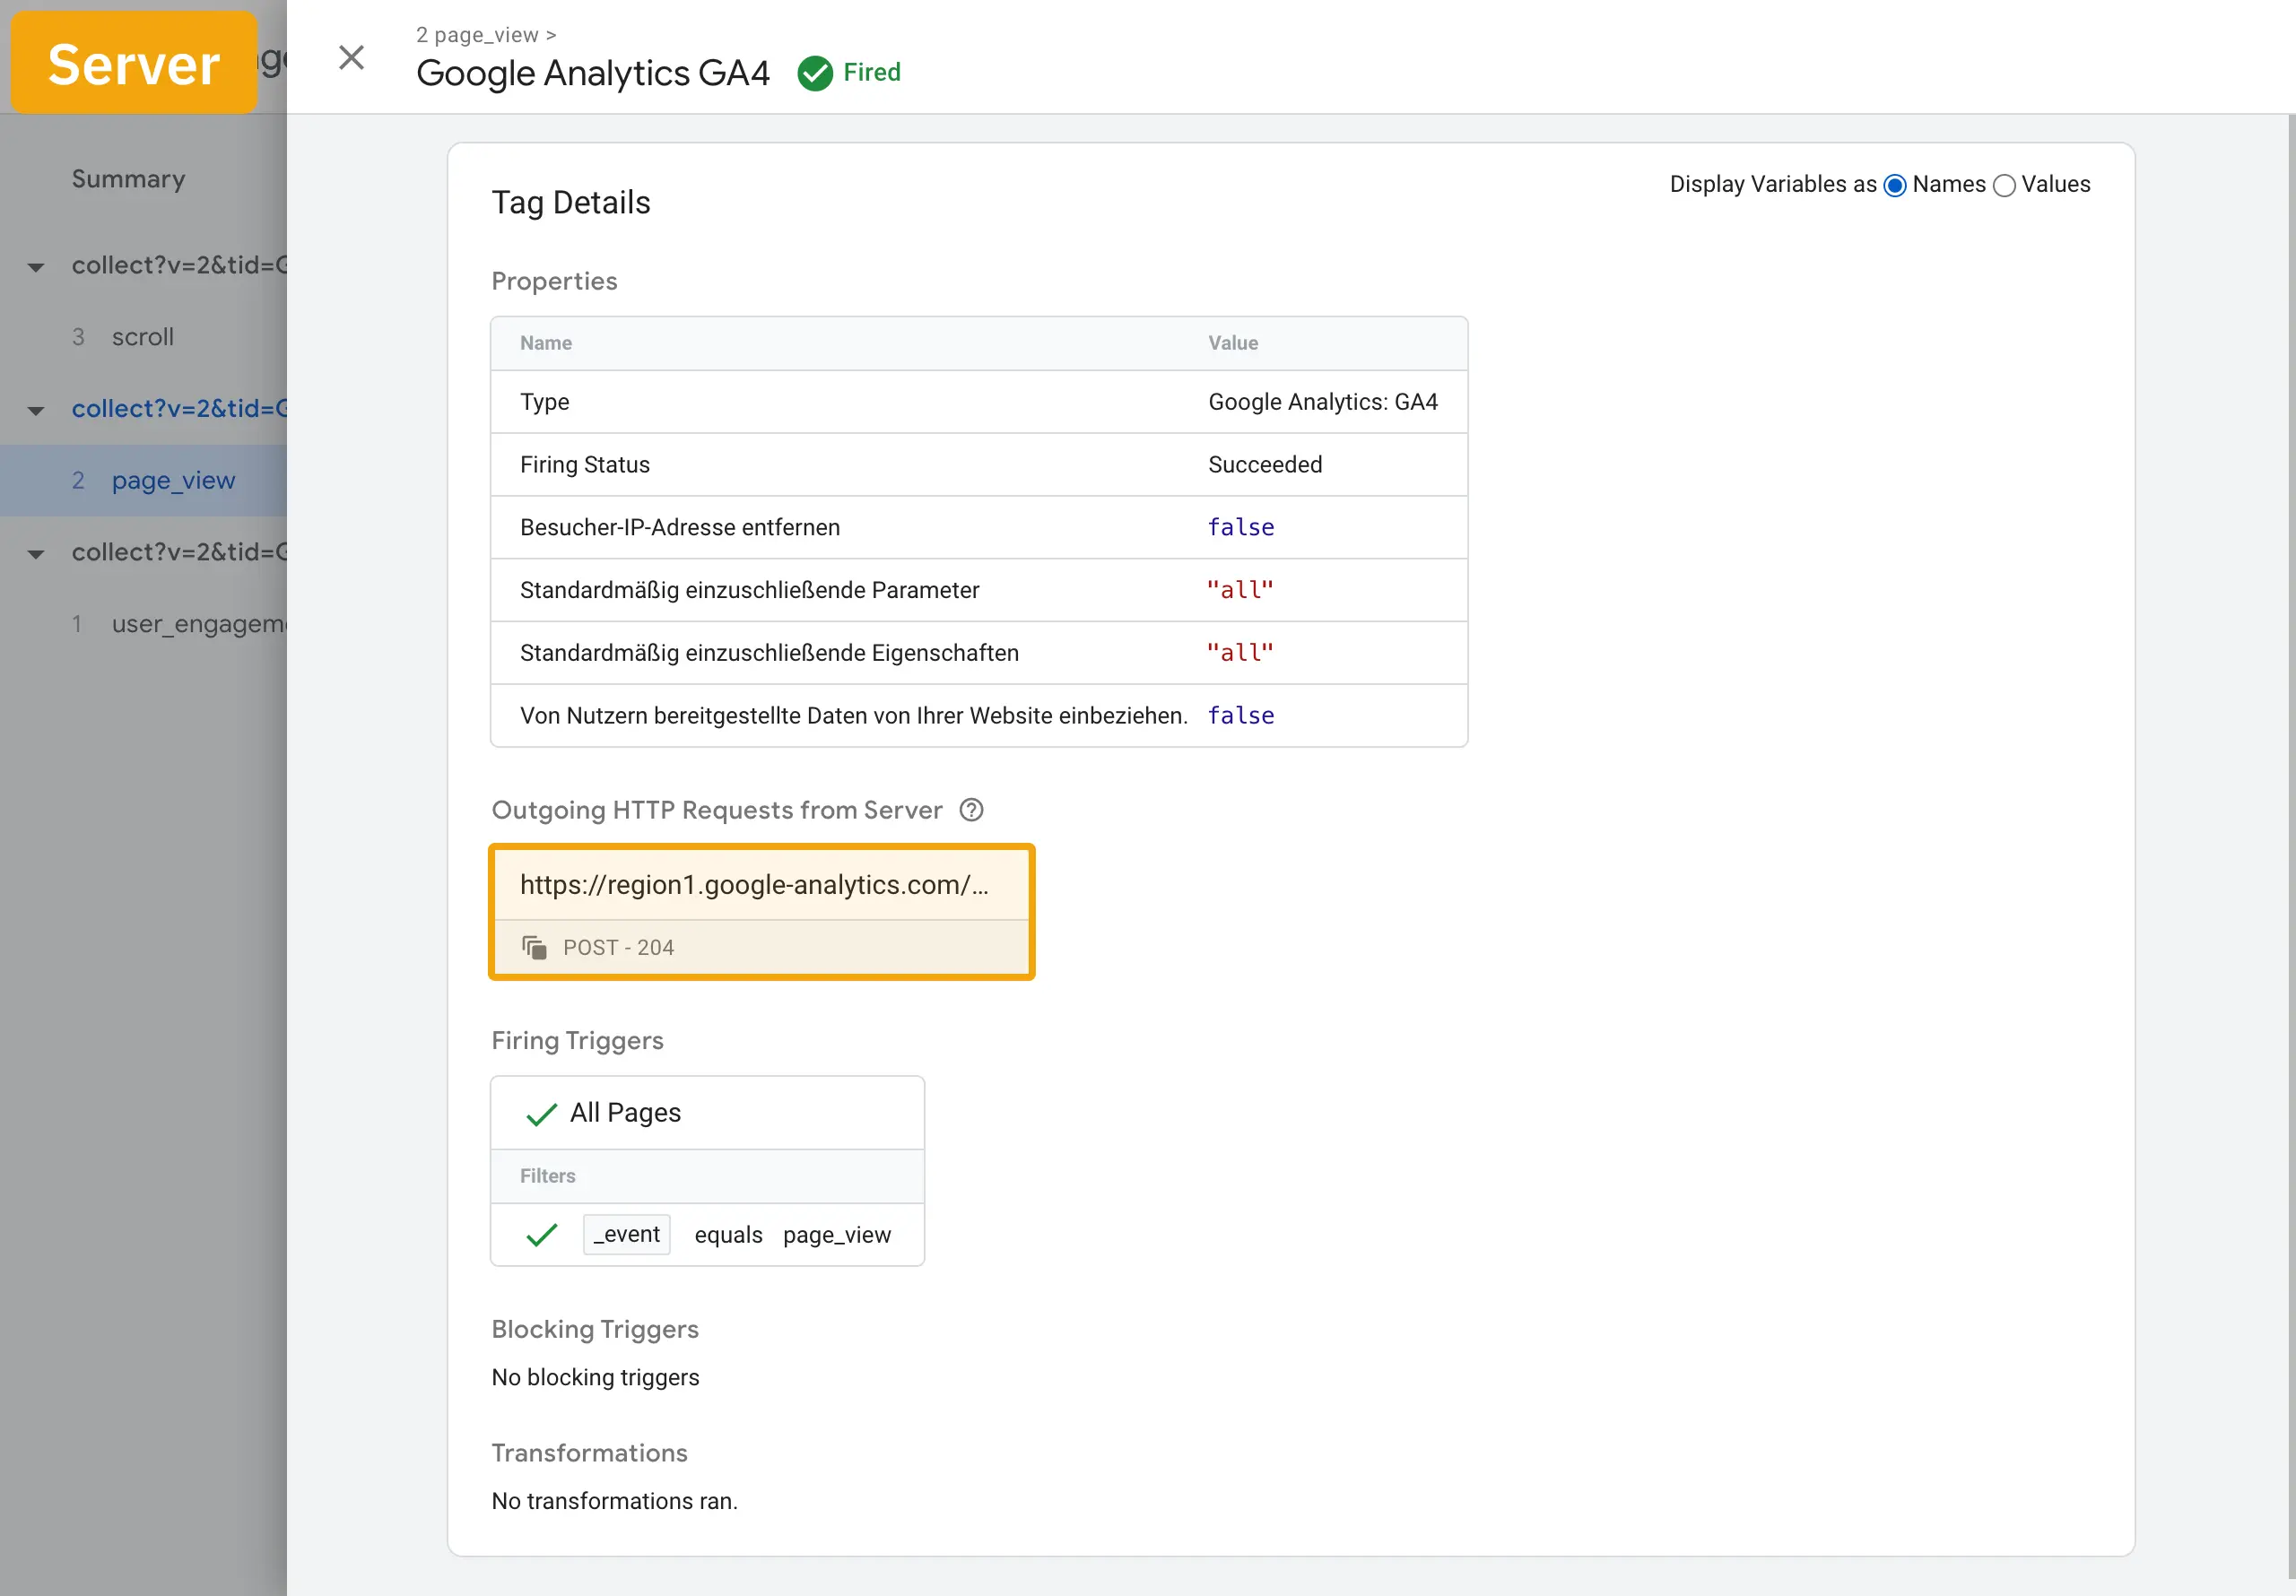
As soon as you interact with your site, you will see various events coming into the server container. The preview mode of the server container looks a little different than what you are used to from the web container, but if you look at the different tabs and elements in detail, you should quickly find your way around.
If you look at a triggered tag in detail, you have the opportunity to view the outgoing HTTP request.
Next Steps
You have now learned all the relevant elements to start with server-side tagging. Now it’s up to you to expand the integration or start with a completely new one.